Getting Started
1. Install Docker Desktop
You can download docker from the official docker website or follow our beginner-friendly tutorial for windows.
Note
For Linux users, you can install Docker using the package manager of your distribution. For Ubuntu users, you can follow these instructions.
2. Download the SDK
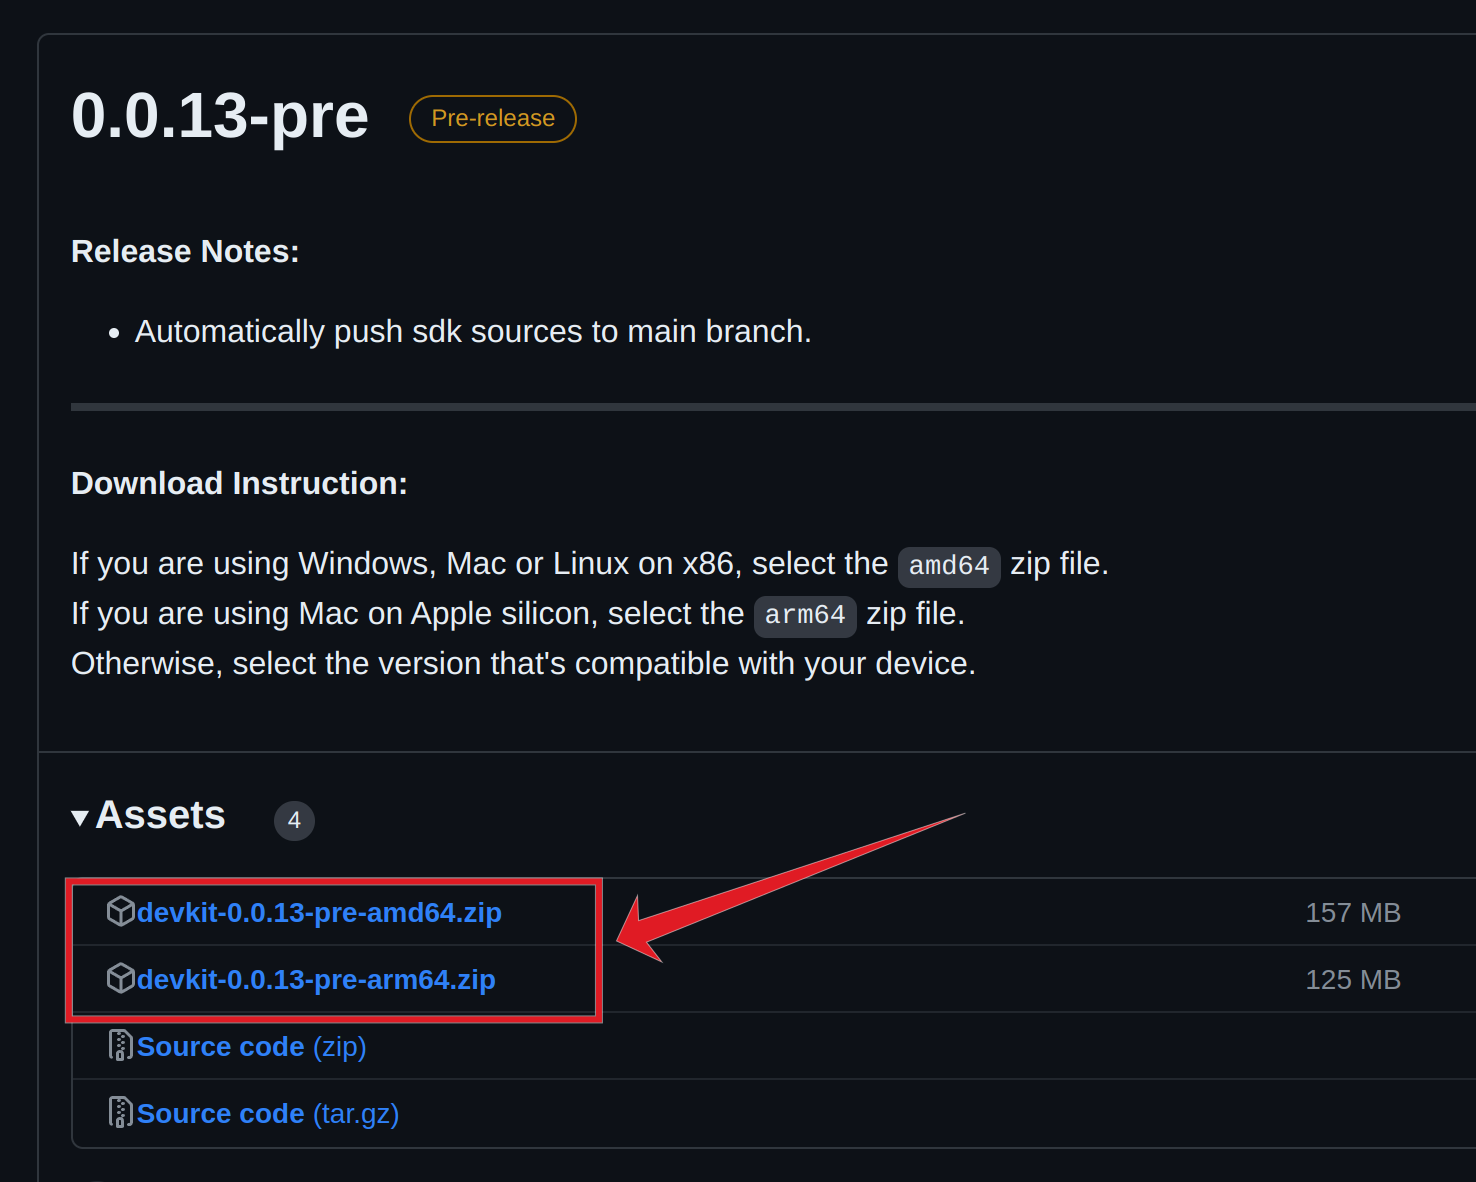
Download the latest devkit-x.x.xzip file from devkit releases repository. Instructions for downloading the SDK:
- If you are using Windows on x86/64 CPU architecture (non-arm CPU), choose the file with amd64 in the file name.
- If you are using Windows on Arm or Mac OS on M-series CPU, choose the file with arm64 in the file name.
After downloading, extract the zip file to your desired location.


3. Starting The SDK
To start the SDK runtime, open windows CMD or PowerShell and navigate to the extracted file's root directory then run:

For VSCode users, you can also do this in the vscode terminal.
Docker may take sometime to download and install the container and its dependencies. Wait for the message Listening on port :3000 which indicates that the server is already running and ready to accept connections.

Now you can access the Flare Hotspot web interface:
- Captive Portal: http://localhost:3000
- Admin Dashboard: http://localhost:3000/admin
- username:
admin - password:
admin
- username:
- Database Management: http://localhost:3001
- Documentation: http://localhost:3002
The server will automatically recompile and restart when you make changes to any of the plugins. You have to refresh the browser to see the changes.
4. Upgrading The SDK
To upgrade the SDK, download the latest release from the devkit releases page and extract the contents to your desired destination. Then copy your plugin directory into the plugins directory inside the new SDK. Make sure to stop the previous SDK runtime then start the new SDK runtime.